Thursday, March 31, 2016

MATLAB Introduction: The "Glorified Calculator"

Partner(s): Jenny Gubner & Meba Gebre

Through the following introductory tasks in this matlab textbook (super #sassy and #funny) by Allen Downey and read chapters 1-4.

General Tips/Notes for coding in Matlab:

  • %    denotes a comment; define what a program does, preconditions, postconditions
  • ;      suppresses the output of the command (otherwise printed in the console)
  • ...    breaks up a line that can take up multiple lines
  • 1/0  denotes true and false (respectively)
  • ~=   not equal
  • script - a savable file/program (not working in the console/interactions pane)
  • to run a file, save it and then run (always save before running)
  • who - this command prints the names of the variables
  • clear _variable name_ - removes/deletes the variable
  • disp(z) - prints the value of the variable z
  • matrix = ones(2, 3) - creates a matrix named matrix filled with ones that is two rows by three columns
  • **indices for accessing stuff in matrices start at 1**
  • all loops/compound statements: for, while, if/else are closed with "end"
  • running a file in the console: 
    • name of the file
      • >>fibonacci2
    • or if n needs to be specified
      • >>n=10; fibonacci2


Exercise 2.1: fibbonacci1 script


Console:


Exercise 2.3: car_update script
The problem with this code is that you would have to input the number of cars at Albany and Boston for every week that you wanted the computation done. (re-enter the new car numbers, so for computing the numbers over multiple weeks, would have to call the script many times)


Exercise 3.1: car_loop script
With each run of the loop, updates the variables a and b to the be the number of cars at the respective locations (Albany and Boston).


Exercise 3.2: car_loop script w/ plotting
This exercise plots the car numbers at Albany(red) and Boston(blue) over the 52 weeks.


(you can see a clear equilibrium point between the two locations)

Run for initially 10000 cars at Albany and 10000 cars at Boston.


Exercise 3.5: fibonacci2 sequence script

>> n=10; fibonacci2


>> n=15; fibonacci2


>>n=20; fibonacci2


**TAKE NOTE: n starts counting at the third fibonacci number**

Exercise 4.6: plotting fibonacci ratios


(as you can see, the fibonacci ratios converged about 8 terms in to a value at about 1.6)

Baseball Simulation:


Max angle: 45 degrees, x value is 261.6295m
If you graph many other angles (leaving the 45 degrees trial red), you get the following graph:
angles tried: 30, 40, 43, 47, 50, 60

Modification: You could easily create a new script to call the bball script multiple times (in a loop), adjusting the angle each time and then at the end, returning the max angle value and the max x distance rather than manually doing trial and error

Skills:

  • matlab
  • plotting
  • functions
  • for loops
  • if/else loops


my favorite catch ever #gocubs


Monday, March 28, 2016

Sensei-Sensing and Proportional Control


What is proportional control?

Proportional control is a type of feedback control system. As opposed to bang-bang control which is either all on or all off, the amount of power is proportional to how far we are from the goal/ideal. For example, if we are going from one stoplight to the next, it doesn't make sense to go full power from point A to point B, does it? It is better to go fast in the beginning (when you have the full distance to go), but as you get closer to your goal, slow down so that you can inch towards the goal.

Error = Goal - sensor measurement
Kp = proportional gain (constant,  depends on the problem)

Output of the proportional controller = Kp (error) + (controller output with zero error)

One of the problems with proportional control is that at some point, the goal value minus the error (how far we have yet to go) is so miniscule that we will never approach the target. At this point you can create a nudge that inches towards the goal is achieved.

Partner: Rachel Hwang

Task 1: Ramp(aging) & Straight Line Proportional Control 
For this task, we worked on getting Stew to go in a (relatively) straight line up and down the ramp. We were not entirely successful in getting the Sciborg to go perfectly straight up the ramp, but we were able to get it to go straight on both the carpet and most of the way up.

One of the main difficulties in completing this task was that the ramp would bend due to the weight of the Sciborg. Over many trials, Stew tended to head a little to the left, but we could still find a way to get him to go straight-ish up the ramp. Another problem we dealt with was that one of the engines would turn off seemingly randomly, causing Stew to spin around in a circle (this was eventually fixed by replacing the batteries). Overall, this was more effective than using bang bang control because we were able to adjust in smaller amounts.


Defeats:


Victories:


Task 2: Proportional Power to Tim-Buck-Ten-Feet

The key to deconstructing this problem was in setting up the right equation. When the distance from the goal (the error value) was large we wanted the power to be large and decrease proportionally as we got closer to the goal. As expected, eventually, the power became so low that it could not overcome the coefficient of static friction, and the Sciborg would no longer be moving forward, despite the loop() still going. We then wrote a nudge function to inch towards the target, and then stop.

One of the main problems in approaching this problem was setting up the equation in the first place, understanding which values should increase/decreased based on how big the error was. In addition, we wanted the value of for the error to be an average between the two positions of the two wheels powering Stew's forward motion. Lastly, but not leastly, we had to create a conditional that dealt with a power that was greater than 255, because if we set the power to be >255, they would just stop.

*Here we set the power to be proportional to the distance we had yet to go and added a constant of abour 110. The difference between 110 and 113 accounting for the differences in age/efficiency of the motors*
12643 was the value that we had previously determined was the position of the motor after having travelled approximately 10 feet.
**note the delay of 50ms was the duration of the nudge. During testing, this could be adjusted for how long we needed to nudge forward. Another way to deal with this would be to leave the delay at some arbitrary constant value and then call nudge repeatedly until we have reached our goal.

Before we wrote nudge, Stew would stop about 8 inches from the line.

Overall, I think that proportional control would be much more effective for real life driving/controlling a car (fuel efficiency and such). However, in the case of the Sciborg, it was much easier to program how far the Sciborg needed to drive and then stop than to adjust the Kp factor through trial and error.

Wait, wait, re-iterate(?)


Success!!! (within 1 centimeter of the goal line)


Task 3: Ultrasonic Sensing (Follow The Leader)
Basically for this task, we were supposed to get Stew to use the ultrasonic sensor to find the distance to the object (a piece of delrin board in front of him) and proportionally set his speed (fast for far, slow for close). The proportional control was much better than bang-bang control for this because Stew was adjusting the speed to what was appropriate to more accurately and precisely follow a board/other Sciborg. Whilst writing this code, we realized that we had written a mishmash of bang-bang and proportional control for our Conga Line assignment previously (we had three if statements for far, medium, and close distances). Oops. Anyways, we now fully understand the difference between bang-bang control (all on or all off) and proportional.


Task 4: Proportional Line Following
For this task, we were asked to use the NXT Brightness sensor to proportionally follow the white lines on the melamine. The key to understanding this problem was in not just proportionally adjusting one motor's speed but both motor's speeds, so that Stew could turn both left and right to follow the line. This was the clearest example of when proportional control is MUCH PREFERRED over bang-bang control because it was able to most efficiently compensate for changes in the environment it was sensing. (see bang-bang follow the line) Again, we also had to set up a case to deal with a power greater than 255 so that Stew would just turn until he found the line again.


Skills learned/worked-on:

  • proportional control
  • sci-borg coding in c
  • sensing, input and output
  • light sensors
  • ultrasonic sensors
  • motor encoders

Friday, March 11, 2016

Real-world feedback/control systems (psst: its not just magic!)

Identify four feedback/control systems you encounter in your everyday environment.


1. Air Conditioning/Heating System
    • sensing mechanism -- the thermometer senses the approximate temperature of the room
    • control computation mechanism -- the computation (using closed loop bang-bang control or ) decides if the room temperature is below a certain threshold (say 5 degrees F below the desired threshold)
    • actuation mechanism -- the heater/air conditioning unit runs until the air is a little above the desired temperature

2. Seatbelt Warning
    • sensing mechanism -- a sensor senses if there is a certain amount of weight in the seat; senses if the seatbelt is locked into the buckle
    • control computation mechanism -- using bang bang control, check if the weight is above the minimum threshold and if the the seatbelt is buckled; decides whether the actuating mechanism needs to be turned on or not
    • actuation mechanism -- the seatbelt warning light (sometimes this is paired with an annoying sound)


3. Auto-Flush Toilets
    • sensing mechanism -- sensor (perhaps one more accurate than the ultrasonic ones we used?) senses the distance of the object directly in front (stall door or person)
    • control computation mechanism -- checks if the distance to the object directly in front is below (say, 1 foot) and decides whether to flush or not
    • actuation mechanism -- the valves that deal with flushing water (pumping water in and pushing waste out)

4. Light Sensor/Grocery Store Door Sensor
    • sensing mechanism -- sensor that could detect body heat (infrared sensor) or a variation on the ultrasonic sensor that senses the distance to multiple objects
    • control computation mechanism -- if body heat is detected in the room, tell the light to turn on; if there is a change in the distance to an object, tell the light to turn on
    • actuation mechanism -- the light or door motor (bang-bang controlled) on or off


Thursday, March 10, 2016

Sensei-Sensors & Bang-Bang Control

More work with the Sci-borgs!

Partner: Rachel Hwang

1. Use the various sensors (touch, ultrasonic, brightness, and encoder) to fine-tune how exact your Sciborg (Stew) can get to the 10 foot line.

Task 1: Tweaking the Motor Encoder
The motor encoder basically can read the position that the motor is at, represented by a number (but is calculated cumulatively if the wheel keeps turning forward over many rotations). When we first ran the sketch, it ran the motor backwards and forwards for one second each. However, we noticed that the position didn't go back to zero. The first reason being that the motor after turning forwards and backwards for one second doesn't return to the exact same spot, the second reason being that because of the interval in which the motor checks itself. In this case, we had the motor check every 1 second, thus over multiple cycles of forward and backward, the lag/difference would be compounded.

Code notes:
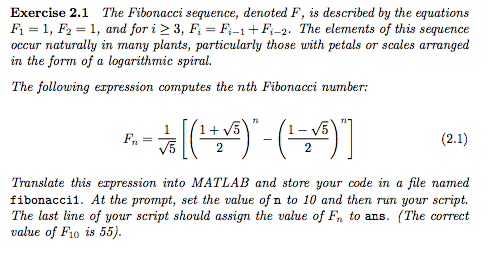
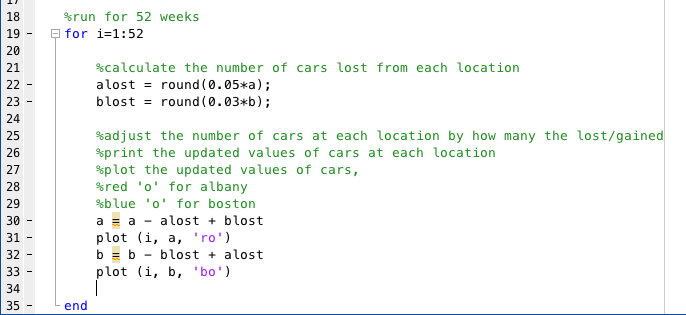
- The code in the first image includes all of the packages and libraries required to control the motor and read the position. In addition, it sets up a variable to keep the time elapsed and a variable rpms that is the speed of the motors.
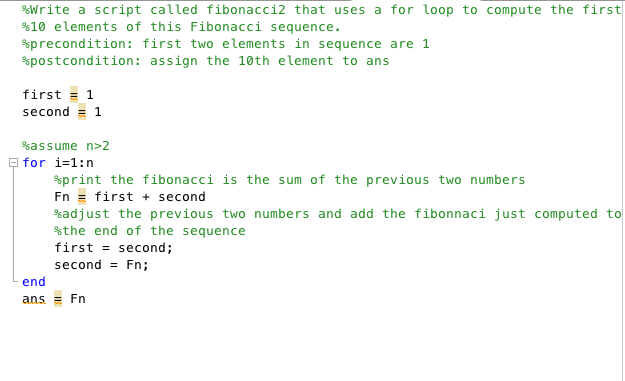
- The code in the second image sets up the Arduino to print the serial print statements in the 11520 baud setting. and tells the motors to begin.
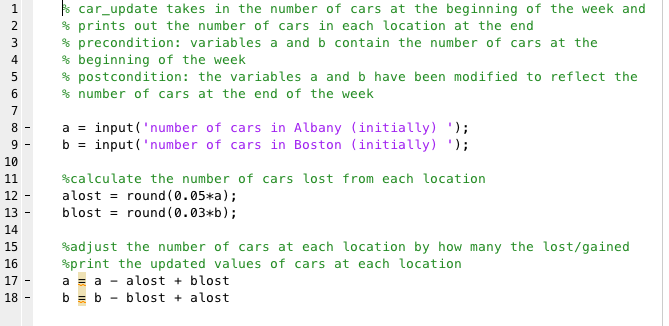
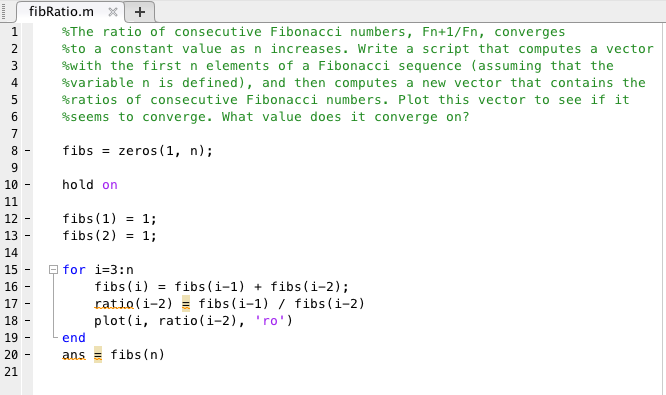
- The code in the third image creates two variables motor1 and motor2 that will eventually store the  position reading of each motor. Both motors are set to drive at the speed of rpms for 1 second, and then to go the same speed but in the opposite direction for one second.


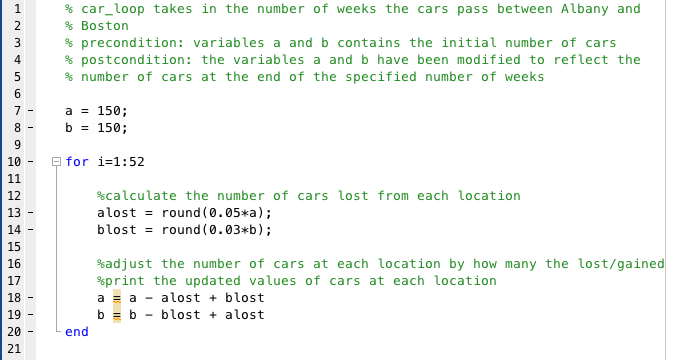
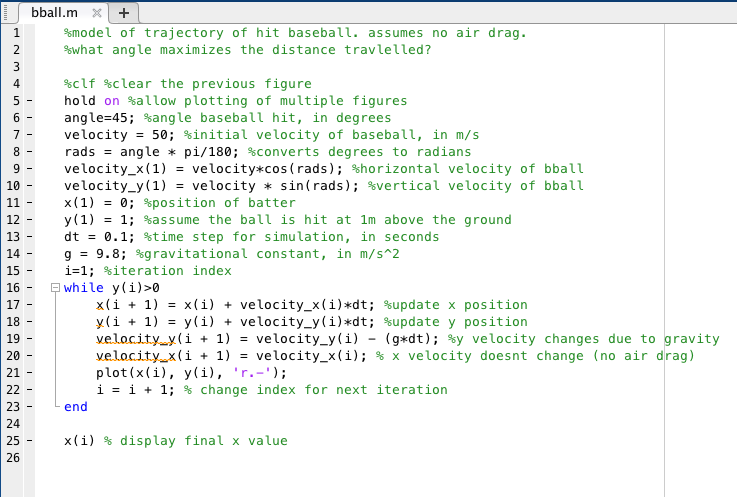
Next, using measurements for the radius of the wheel and the length of the track (10 ft), we calculated the number of revolutions the wheels would have to go in order to go 10 feet (about 18 revolutions). We looked at the serial window, and saw a rough estimate of what the motor encoder would read after that number of revolutions (12643) and created a while loop for the motors to run while the motor encoder read value was less than 12643.


C'mon Stew! I know you can do it! (from this angle, Stew kind of looks like a bug)
Conclusion: Pretty close, but not quite there. Probably because he doesn't move in a perfectly straight line. What are some other sensors that we can use to get him to the line?

Task 2: Tweaking the Touch Switch

We connected the touch switch to the Arduino (not an easy feat), and got the program to change the printout in the Serial window to the status of the button (pressed or unpressed). The key to getting the circuitry is using an LED in the circuit to visualize the state of the button (if electricity if flowing or not). Only one LED was sacrificed(burned out) in the testing of this process.


After we were able to get the Serial window to accurately print the status of the button, we altered the code so that the motors would stop once the button was pressed. Just to push ourselves a little bit further, we coded Stew to, once the button was pressed, stop, back up, turn around, and head the opposite direction. Cool, huh? Go, Stew, go!

Wiring:
   

Stew: Stop when button is pressed.


Stew: Stop when button is pressed, then turn and go the other direction.


Code for final behavior:


Task 3: Tweaking the Light Sensor


In this exercise, we we attached the light sensor to the Sciborg and looked at the Serial window to see the different readings from the sensor. We also looked at how accurate the readings where with the additional LED light on and off and concluded that the LED light off was better. In order to get Stew to stop at when the light sensor was at the white line, we set the dark value for the light reading to set the motors to full power (Scaled light value < 70) on and the white tape light reading to be motors off (Scaled light value >= 70). The values ranged from 10 to 90ish. The distance to the surface was optimized after we attached the light sensor to Stew, about 2 cm.


Failed attempt (so you know we aren't always perfect):


Success:


Task 4: Tweaking the Ultrasonic Sensor

(Since I forgot to put in comments, here are the general notes on the code.) Basically we imported all of the relevant and required libraries, and set the Serial window input to be at 9600 baud. Depending on the value read from the ultrasonic sensor (the distance Stew was from something directly in front of him), change the behavior. If Stew's ultrasonic sensor read anything lower than 16, then stop (because he quickly approaching an object.)


Task 5: Use bang-bang control to get the Sciborg to go in a straight line. Bang bang control is basically on-off sensing. For example, if the air in your house gets too cold, then the heater turns on for a certain amount of time and then turns off, there is no in between. In this case, if one motor was lagging behind the other, then adjust the speeds of one motor so the other could catch up.


Task 6: More bang bang control - get your Sciborg to follow the white path!
(yellow brick road aka white tape road)
The key to success in taking apart this problem was by placing the light sensor on the edge of the tape. Take note of the light reading off the tape, on the edge, and completely over the tape. Thus, we were able to tell Stew to adjust a specific way (right or left) based on the light reading. Greater accuracy with following the path was achieved through decreasing the delay between measurements and decreasing how harsh the turn was to readjust the direction. Look at Stew wiggling is way down the white tape road! Off to Oz he goes!


(pretty jerky and misses the final turn) wait wait, reiterate!

(better, adjusted by the size of the delay and speed of the turn to adjust)

Task 7: Conga line! 
Adjust the ultrasonic sensor code so that when it is far away from the object in front, go full speed ahead (with adjustments so it goes in a straight line); when it is medium distance from front object, go slow, when very close to front object, stop. 


(Stew is following the board, Katrina, Vivian, and Jiaming's Sciborg is following)

Stew also led he following line with Magnolia and Amy's Sciborg.

Overall, working on these exercises, the coding got easier over time, however, it was often hard to find new ways to work at the problem. Of all things, I would tell the students next year to never forget about the delay function, it is your friend!! Start by working on little steps, like going straight forward, and then working your way up. If anything goes horribly wrong or too complicated, the simply start over! Sometimes it helps to think of new solutions by starting with a clean slate! In addition, try taking apart the problem and working out how to approach it in a broad sense before you start coding!

Skills:
  • bang bang control
  • sci-borg coding in c
  • sensing, input and output
  • light sensors
  • ultrasonic sensors
  • touch sensors
  • motor encoders